How To Install Water Heaters
How to install a hot water heater?
Disclaimer: Installation of water heaters can be hazardous and may involves complications. We do not recommend DIY on any installations. Below details are provided for information only. Always contact your local certified installer and call your local department for inspections and ask if you need a permit. And make sure a plumbing or electrical inspector is involved with the process.
This article contains instructions on replacing a natural gas water heater and will give a basic idea with regards to what to do with other types of water heaters. The steps for replacing a propane water heater are exactly the same, and those for an electric water heater are similar. In every case, always, play it safe. New water heaters come with installation instructions and lots of warnings to make sure you handle the gas, electrical and other connections safely.
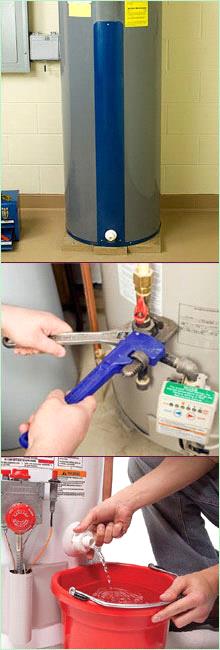
Step 1: Turn off the gas and the water
First and foremost, you will need to turn of the gas to the water heater by turning the shutoff valve to a quarter turn. The valve should be located nearby and you would be able to spot it with ease. When off, the handle should be at a right angle to the pipe. Shut off the main water supply as well and drain the lines by opening a faucet on the lowest floor.
Step 2: Remove all the water from the tank by draining it out
Connect a garden hose to the drain valve of the water heater, located on the bottom usually. Caution: The water will be scalding hot! Disconnect the gas line at the nearby union with a pair of wrenches and unscrew the pipe from the gas control valve with a pipe wrench.
Step 3: Cut off the water lines
You will need to unscrew the vent pipe which is connected to the vent hood. Once unscrwed, move it to the side. Now cut the hot and cold water lines with a tube cutter. (Unscrew unions for galvanized pipe or the nuts on flexible connectors if you have them.) Slide the old water heater out of the way.
Step 4: Time to attach a relief valve
Wrap the threads of the new temperature and pressure relief valve with Teflon tape. It should be about three turns, make sure not to overtighten it or else you may end up with a broken thread. Screw it tightly into the tank with a pipe wrench. Attach a copper discharge pipe.
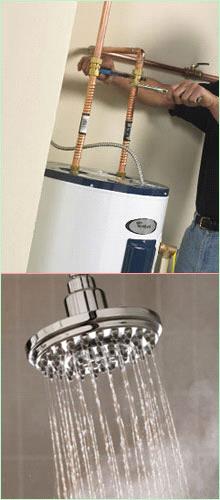
Step 5: Connect the pipe assemblies
This is where it gets tricky. You will need to solder a new copper adapter to 6-in. lengths of 3/4-in. copper and screw the assemblies into the hot water outlet as well as the cold water inlet which is located on top of the tank. Add a short, plastic lined nipple to create a shield against the galvanic corrosion. This is really important when you have hard water or if it is regulated by your city codes.
Step 6: Attach the water lines
Slide the new water heater into place, recut or extend the old tubing to meet the new, and solder the tubing together using copper slip couplings. If the tubing doesn't line up, offset the lines as needed with pairs of 45-degree elbows.
Step 7: Connect the vent system back
Reconnect the vent. Shove it tightly over the draft hood and anchor it with three 3/8-in. No. 6 sheet metal screws. You have to drill the holes in advance. A good installation would be when the vent is rising at least 12 in, vertically before turning at the first elbow.
Step 8: Time to attach the gas line again.
Reconnect the gas line. You will have to use a join compound to coat the threaded ends of the pipe, and then screw in the first nipple into the gas valve. You will have to make sure that you dont over stress the valve, and hence it is recommended to use two pipe wrenches. Reassemble the remaining nipples, finishing up with the union. Once you are done, it would be the time to fill up the tank. Close the drain valve; turn the water back on at the main shutoff and open the cold water valve to the water heater (leave it open); turn on a nearby hot water faucet until water comes out; and inspect all the joints and fittings for water leaks.
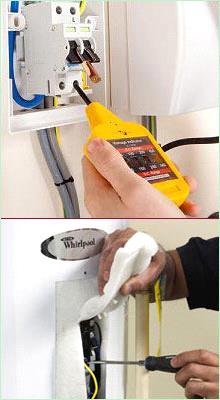
Step 9: Check for backdrafting
Most water heaters rely on a natural draft to draw combustion fumes up the flue. If the draft doesn't work, those fumes, possibly containing deadly carbon monoxide, will spill out into your home. After completing your installation, check the draft. Close all exterior doors and windows and turn on your kitchen and bathroom exhaust fans. Then open a nearby hot water faucet until you hear the gas burner in the water heater ignite. After a minute, move a smoking match around the edge of the draft hood on top of the heater. The smoke should be drawn up the vent pipe. If the smoke doesn't draw, the fumes from the burner aren't venting. Turn off the gas to the water heater and call a licensed plumber to correct the problem.
Step 10: Check for leaks
Turn on the gas and check connections for leaks by brushing a 50-50 mixture of dishwashing liquid and water over the joints. If the mixture bubbles, you have a leak. Tighten or reconnect joints that leak. Wipe the joints dry when finished. Call the plumbing inspector to check over your work.
Step 11: Light the pilot light
Light the pilot light according to the manufacturer's directions. (For electric water heaters, turn the power on at the main panel after the electrical inspector checks your work.) Finally, set the temperature to 120 degrees F. following the installation instruction
![]()
![]()